Thursday, May 26, 2011

Memorable Sepia

Final Results
Step 1
Open a photo into Photoshop. Use a wedding or engagement photo if you have one because this effect is most suitable for those types of photos.
s
Step 2
In the layers palette, click on the add adjustment layer button and choose Black & White. If you’re using Photoshop CS2 or older, you will not have access to the Black & White adjustment layer. For users of Photoshop CS2 or older, skip this step and proceed with the next step.
Step 3 (For Photoshop CS2 or older)
If you’re using Photoshop CS2 or older, you don’t have access to the Black & White adjustment layer. Instead, you can use the Channel Mixer and Hue/Saturation tool to achieve similar (but not exact) results. Add a Channel Mixer and Hue/Saturation adjustment layer and apply the settings shown below. Remember 
to have the Hue/Saturation adjustment layer on the top.
When done, hold the Ctrl key and click on the two adjustment layers. Then press Ctrl+G to group the layers. The layers should now appear inside a group in the Layers palette. Select the group and choose Layer > Layer Mask > Reveal All.
Step 4
In the layers palette, click on the layer mask thumbnail to select it. If you’re using Photoshop CS2 or older, click on the layer mask for the group. Choose Image > Apply Image and use the settings from the image below. Don’t click OK yet.
Depending on the effect that you like, you can enable or disable the invert option. With the invert option unchecked, the sepia effect will be visible on the highlights of the image. With the invert checked, the sepia effect will be visible on the shadows of the image. Click OK when you’re done using the Apply Image tool.
Step 5
Now we’ll add a vignette that can be position anywhere in the image. Select the Background layer and add a Gradient fill layer. This will add a Gradient fill layer above the Background layer.

In the Gradient fill option, copy the settings from the image below. On the document window, click and drag the gradient and position it where your subject is. For the image used in this Photoshop tutorial, I positioned in on the faces of the subjects. If you cannot see where the gradient is being positioned, click OK, change the blending mode of the Gradient Fill layer to Multiply, then double-click on the layer again to adjust the Gradient Fill settings.
Change the blending mode to Multiply, if not already done.
Final Results
Here are the final results of this memorable sepia Photoshop photo effect. There are two variations to the effect and both have quite different results.

Copy Write : http://tutorialpulse.com/51/memorable-sepia/

Monday, May 23, 2011

Celebrity Extreme Makeover

Tuesday, May 17, 2011

Al Pacino

Sunday, May 8, 2011

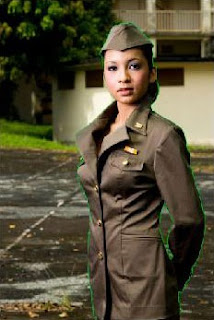
The Distracting Background

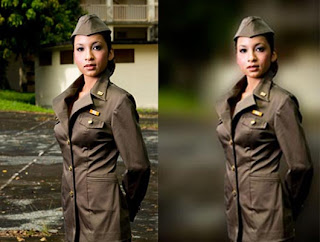
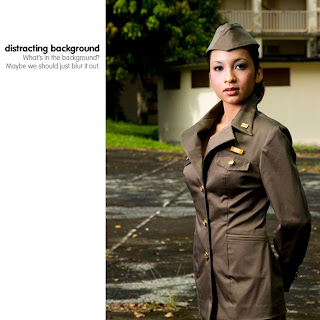
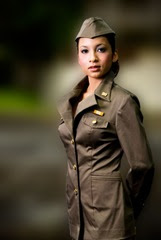
What a beautiful model, uniform, and pose. But there’s something wrong with it. Looking at the image below, you were probably trying to figure out what the background is. The photo looks like it was taken at some parking lot outside an apartment. How does that have anything to do with the uniform? Actually, this photo was taken at an old barrack.

Step 1
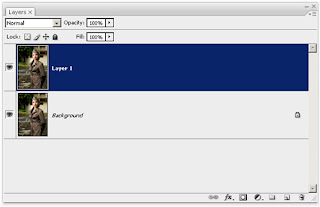
Begin by duplicating the layer. This will create two layers – one for the blurry background and one for the subject. To duplicate a layer, choose Layer > Duplicate. Make sure that you have the new layer, Layer 1, selected.
Step 2
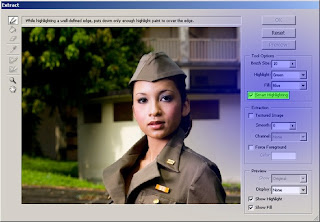
Now we’ll use the Extract filter. This filter makes it easy to cutout something from a photo – in our case, it will be to cutout the model. Choose Filter > Extract to open the Extract tool. To extract, draw a line on the edge of the model. But before we do that, checkmark the Smart Highlighting option. This will snap the brush to the
edge making the process faster and easier.
Outline the model with the brush. You will need to be very precise; if not, the results will be jagged edges.

  • Zoom in about 500% to make sure that you can see the tiny pixels.
  • Use the smallest brush size to make the extraction process more accurate.
  • When you reach the end of the window, hold down the spacebar and your cursor should change to a hand. Click and drag on the picture to move it to another section to continue brushing.
When you’re done, you should have a green online around the model.
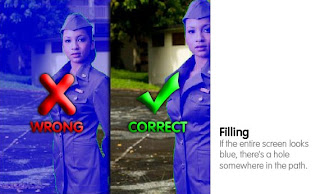
Select the fill tool and click inside the green outline to fill. If the entire image turns blue, there’s something wrong with the outline. If it is just the model, then everything is fine.
If your entire image turns blue when you fill, press Ctrl+Z to undo and zoom in on the outline to find the hole. Usually the hole will be where you started or ended the outline. Once you find the hole, switch back to the brush tool and fill in that hole.
Click the preview button and you should get a preview of the extraction.
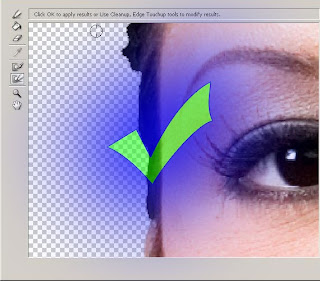
We’re almost done, but we’ll need to cleanup the edges. Zoom into the edge and switch to the cleanup tool.
Brush around the edges and you should start to see the edges get smoother.
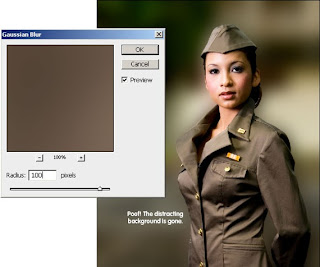
Phew, that was tedious! Well we’re finally done and I promise that you won’t have to do anymore extracting. Everything after this is easy. We’re going to blur the background now. First, select back the background layer. Then, choose Filter > Blur > Gaussian Blur. Adjust the radius to make the background blur. I had to use a very strong blur to make the background unrecognizable.
Now we’re going to increase the focus by adding a vignette. Vignettes are usually frown upon as a flaw with lens, but they can be helpful with enhancing the focus in a photo. To add a vignette, we’ll use the Lens Correction tool. Choose Filter > Distort > Lens Correction. In the Vignette setting, set the amount to -100.
Here’s the before and after of the vignette. Notice how your eye moves around less when looking at the photo with the vignette?
Final outcome and conclusion
Here’s the before and after comparison. The original image had a confusing background and is lacking focus. By adding a strong blur to the background, the image is now a lot easier to focus.

However, this effect should only be used if necessary. That is because this effect doesn’t look real – no camera can create this effect. This effect will look great in a set of photos (ex. wedding package), but only once or twice. Just like photos shot with lensbabies lens, they look interesting the first or second time, but when done for the third time, they’ll look bad.

Copy Write : http://tutorialpulse.com/42/strong-focus-for-killer-portraits-photoshop-tutorial/

Related Posts Plugin for WordPress, Blogger...
Custom Search